Growing Loofahs

Have you recently received a packet of loofah seeds from Sheila Sacks Designs? I’ve included a guide to answer any questions you may have pertaining to the process of growing your own loofahs. Results may vary, so please consider these suggestions only. If you use different techniques, I’d love to hear about them!

Plant Hardiness Zone Notice: The directions listed below are for Zone 6, which includes southeastern Pennsylvania. Please consider your own climate when attempting to grow loofahs, as the length of the growing season and overall environment will greatly affect your harvest, as well as whether to start the seeds indoors or outdoors. Loofahs need a growing season of  A map of plant hardiness zones can be found on the USDA website.


Let’s Grow Loofahs!

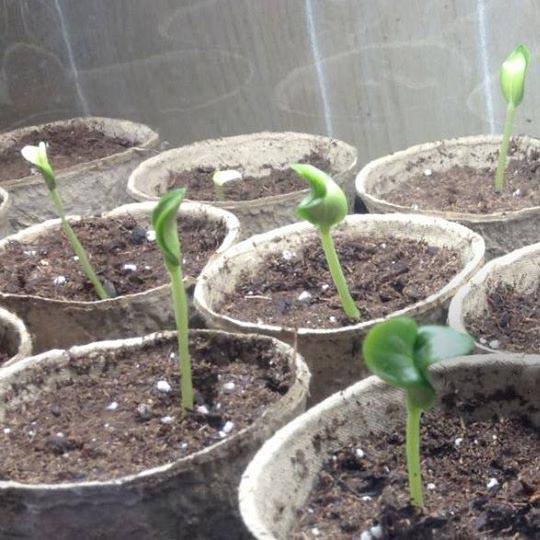
1. Starting the Seeds (April)seedlings

I’ll usually start my seeds indoors 4-6 weeks before moving them outside to allow 6-7 months before harvest. Picture: Seeds sown, one per pot, in organic potting soil and biodegradable pots under a grow light.

Bury seeds 1/2″ deep in soil, water thoroughly, and cover loosely with plastic wrap or a plastic dome to encourage a humid environment. Remove cover in a few days (up to two weeks), once seedlings start to appear, and place in a bright window or under a grow light. A light artificial breeze will discourage leggy stalks.

10151889_610017865746994_1141853618_n2. Development of True Leaves and Tendrils (April-May)

True leaves (with pointed edges instead of oval-shaped) will start to develop within a few weeks, and eventually tendrils will start to appear. I will insert a long bamboo skewer about a half an inch away from the stem (careful not to hit any roots), to offer support to the growing plants, allowing the tendrils to climb. When watering, make sure the soil is damp but not wet. If the soil gets too dry the loofahs may start to wilt, but will pop back fairly quickly once watered.


IMG_77023. Outdoor Transfer (late May)

Loofah plants can be transferred outdoors once the soil is a constant 50 degrees or warmer, and there is no threat of frost. A week before transfer, harden the plants off by moving them outdoors in a shady spot away from the wind for an hour or two, gradually increasing the duration and exposure to sun and breeze daily. Make sure to keep the plants watered but not drenched during the transition.

Once you have hardened the plants off, transplant the loofahs 18″ to 24″ apart along a sturdy trellis or fence. I use a 5′ chain link fence and have plants 18″ apart, alternating sides of the fence. I’ve also seen chicken wire and metal green fence posts being used successfully.

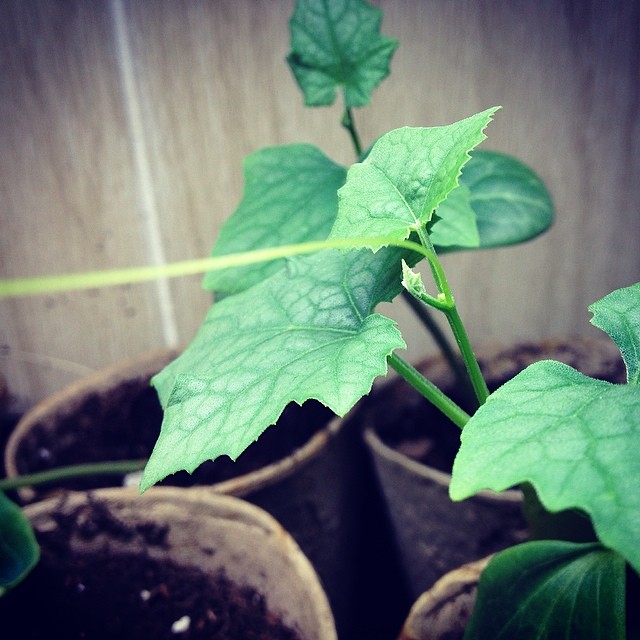
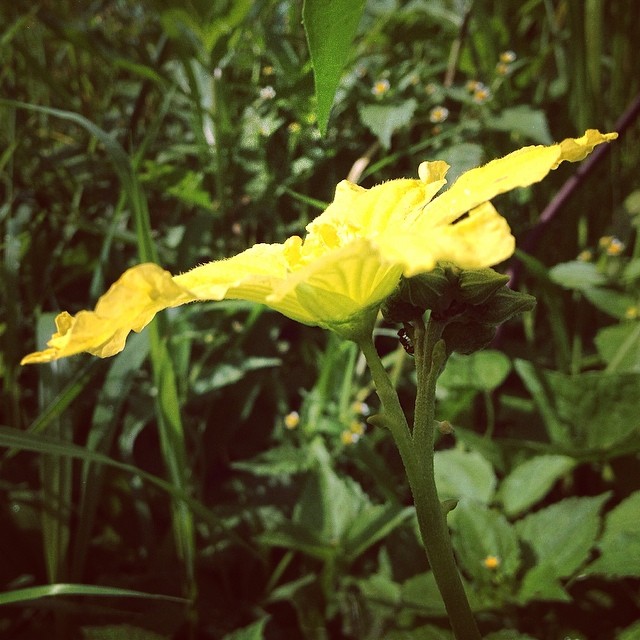
4. Male Flowers Bloom (July – October)10455186_660021774079936_3918383460260180655_n

Expect the first flowers that bloom to be all males, appearing in clusters. Ants and bees will also start to appear to aid in pollination.

10494811_659342537481193_8369553544025645606_n5. Female Flowers Bloom (July – October)

A few days, or even weeks, after the male flowers have appeared, female flowers will start to bloom. A very small loofah can be seen at the base of the flower.

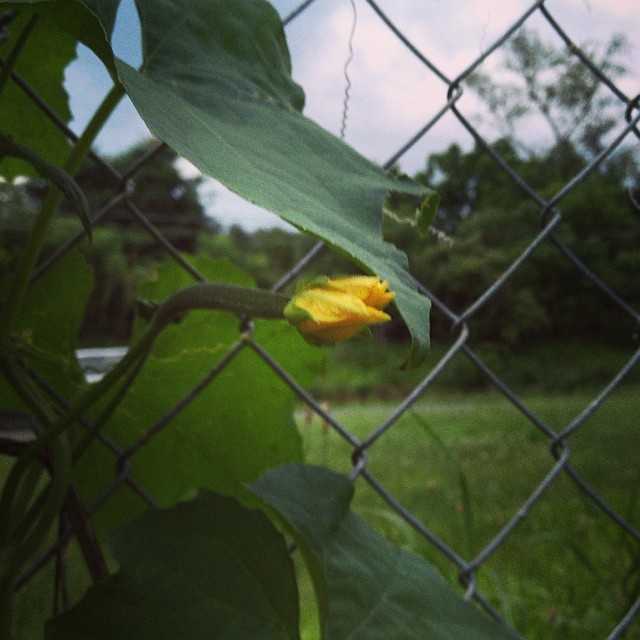
6. Pollination Occurs, Vines Continue to Grow (July-October)IMG_5894

If pollination is successful, the loofah will begin to grow and the flower will shrivel and dry up. As the loofahs start to appear, the plant(s) will continue to stretch out. Keep an eye on new growth and encourage the vines to grow around the trellis or fence by training new vines to grow in an unoccupied area of the trellis.

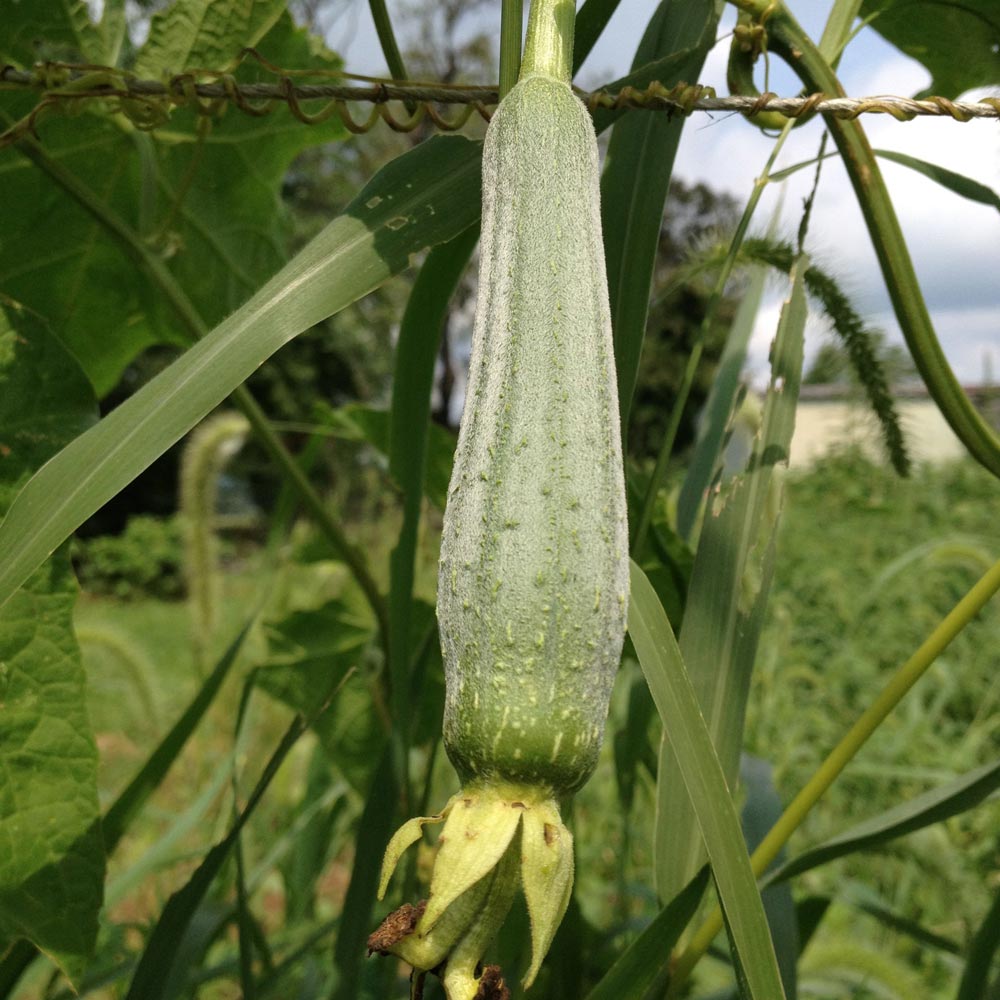
7. Loofah Matures on Vine (July – October)10600531_682005288548251_859855653312583952_n

As the loofah fruit grows, it will turn medium or dark green and grow to 10″-14″+. The immature fruit is very heavy and a strong trellis is crucial — reinforce if necessary with additional supports.

For harvesting mature loofahs, see Step 8; For green loofahs, see Step 9.

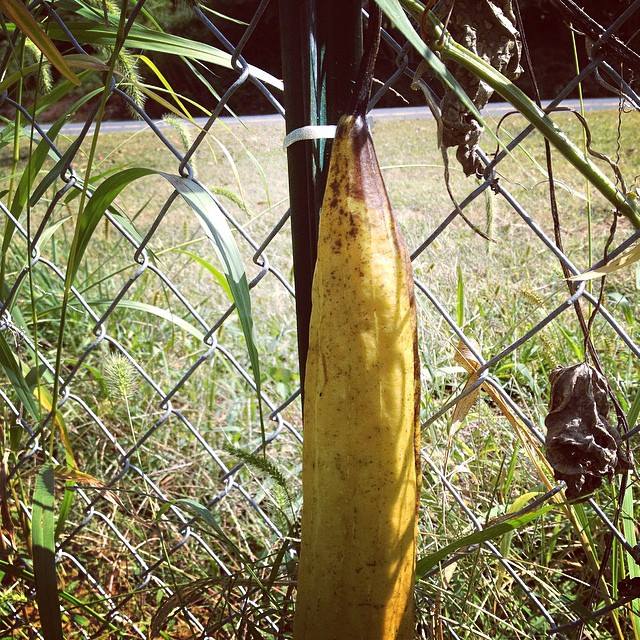
8a. Mature Loofahs (First fruits in October, atypical in PA)10703609_691812210900892_7159104024100961997_n

Depending on when your first female flowers were pollinated, you may find that the fruit has turned from the deep green to a yellow or brown and become very light. If the skin of the loofah feels loose, you may harvest it early or leave it to dry fully on the vine. This is atypical due to the short growing season in Zone 6, but certainly possible.

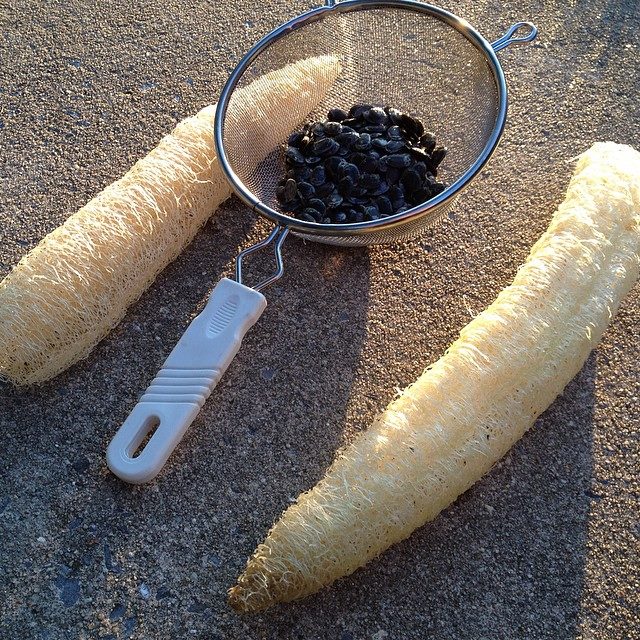
8b. Harvesting Mature Loofahs (September – October)10653834_692825067466273_6366890708969432474_n

To harvest loofahs that have fully dried on the vine and have yellow or brown skin, peel the brittle skin off of the loofah sponge. No pulp should be evident — if it is, make sure to fully remove all traces. Remove the seeds by shaking the loofah to loosen them. Any seeds that have turned black can be saved for the following year. Wash the loofah in warm water until water runs clear to clean away any loose debris.

See “Drying Loofah Sponges” below.

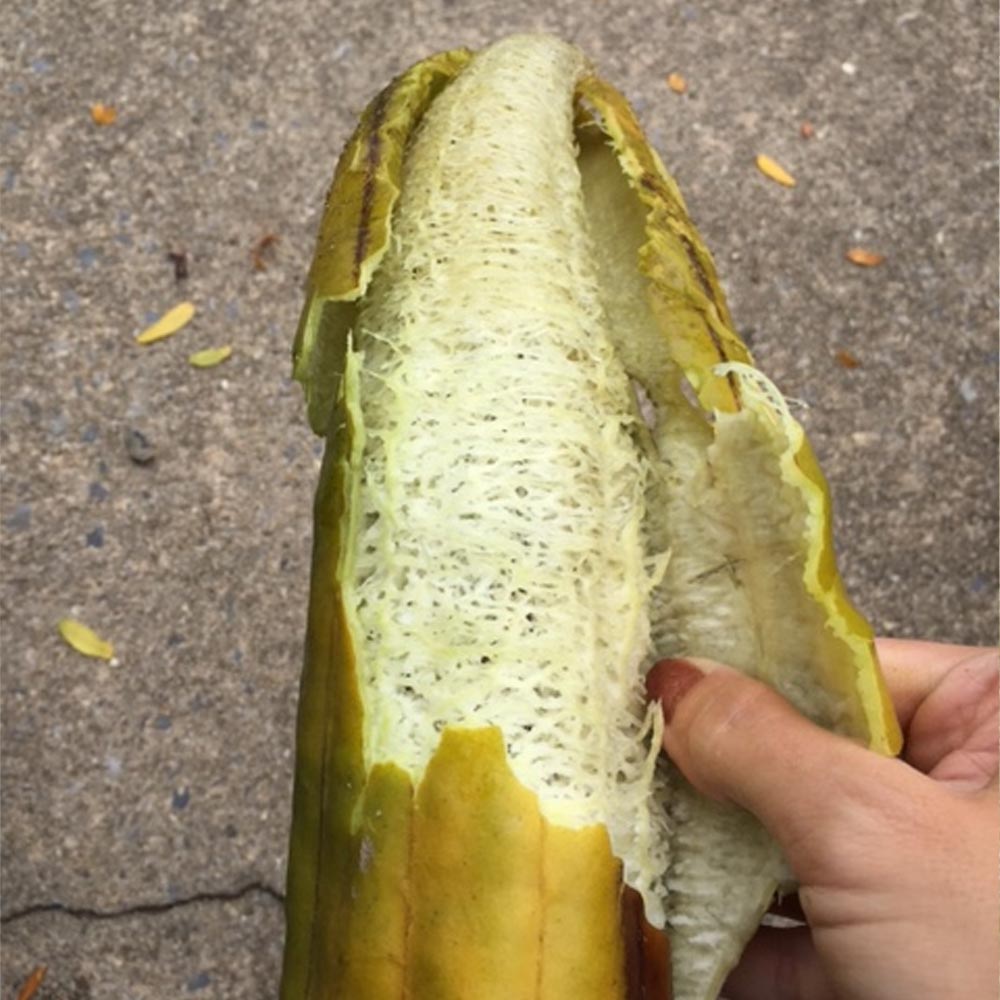
9a. Harvesting Green Loofahs at First Frost (~Mid-October)

Following first frost, cut all full-sized loofahs off of the vines. If loofahs are still dark green, break the tough skin by crushing it against the ground, sidewalk or other hard surface. Don’t worry — if the loofah is mature, it can withstand any blunt force!* Peel the green skin off of the loofah to reveal a fibrous sponge within.

If the loofah is not mature, the lack of developed fiber will break the fruit apart, and it can be tossed in the compost pile.

9b. Harvesting Green Loofahs: Washing and Seeding (At Harvest)loofah

Once you have peeled the green loofahs, I recommend using a one- or two-basin sink, along with a large bowl for scraps, to finish the cleaning process. There may be pulp and fiber in the loofah if it has not fully dried on the vine. Squeeze the sponge again the sink basin to remove any remaining pulp and seeds from the loofah sponge. Again, the loofah is very durable so make sure all of the pulp has been removed before attempting to dry. The seeds are lodged in the center of the sponge, so you may need to use a kitchen shears to cut the loofah in half or in slices, depending on your final use. Seeds may also be removed once the loofah is dried. Once seeded, rinse the loofah thoroughly, wringing it out like a washcloth until the water runs clear.

See “Drying Loofah Sponges” below.

IMG_696410. Drying Loofah Sponges (At Harvest)

Once all pulp and seeds have been removed, allow loofahs to dry fully in the sun or a well-ventilated area, rotating occasionally to allow circulation. Loofah should feel brittle and not have any scent — if any are still damp after 12+ hours they may need to be thoroughly rinsed again to remove any remaining pulp.

Store loofahs in a dry area, and enjoy!